Bulk Orders
Purchasing > Bulk Orders
Select a single Vendor in the Advanced menu.
-
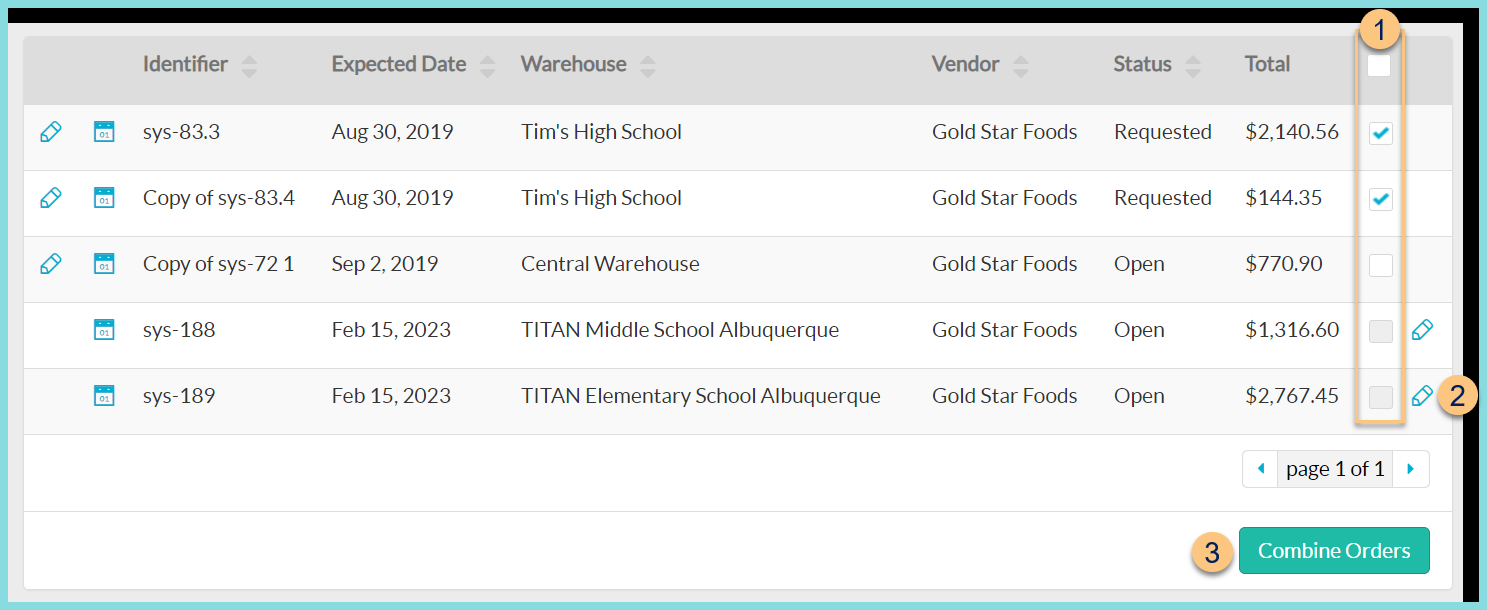
Checkbox - click to select more than one order to be combined or select the header Checkbox to select all returned orders. Note: A checkbox is only selectable if the order is in Open or Requested status and not included in another combined order.
-
Right Pencil - click to be redirected to the Consolidated Order screen for an existing combined order
-
Combine Orders - click to combine the selected orders and be redirected to the Consolidated Order screen
Note: Once an order has been combined, it can no longer be edited individually. The Left Pencil icon will be disabled.
Consolidated Order Screen
-
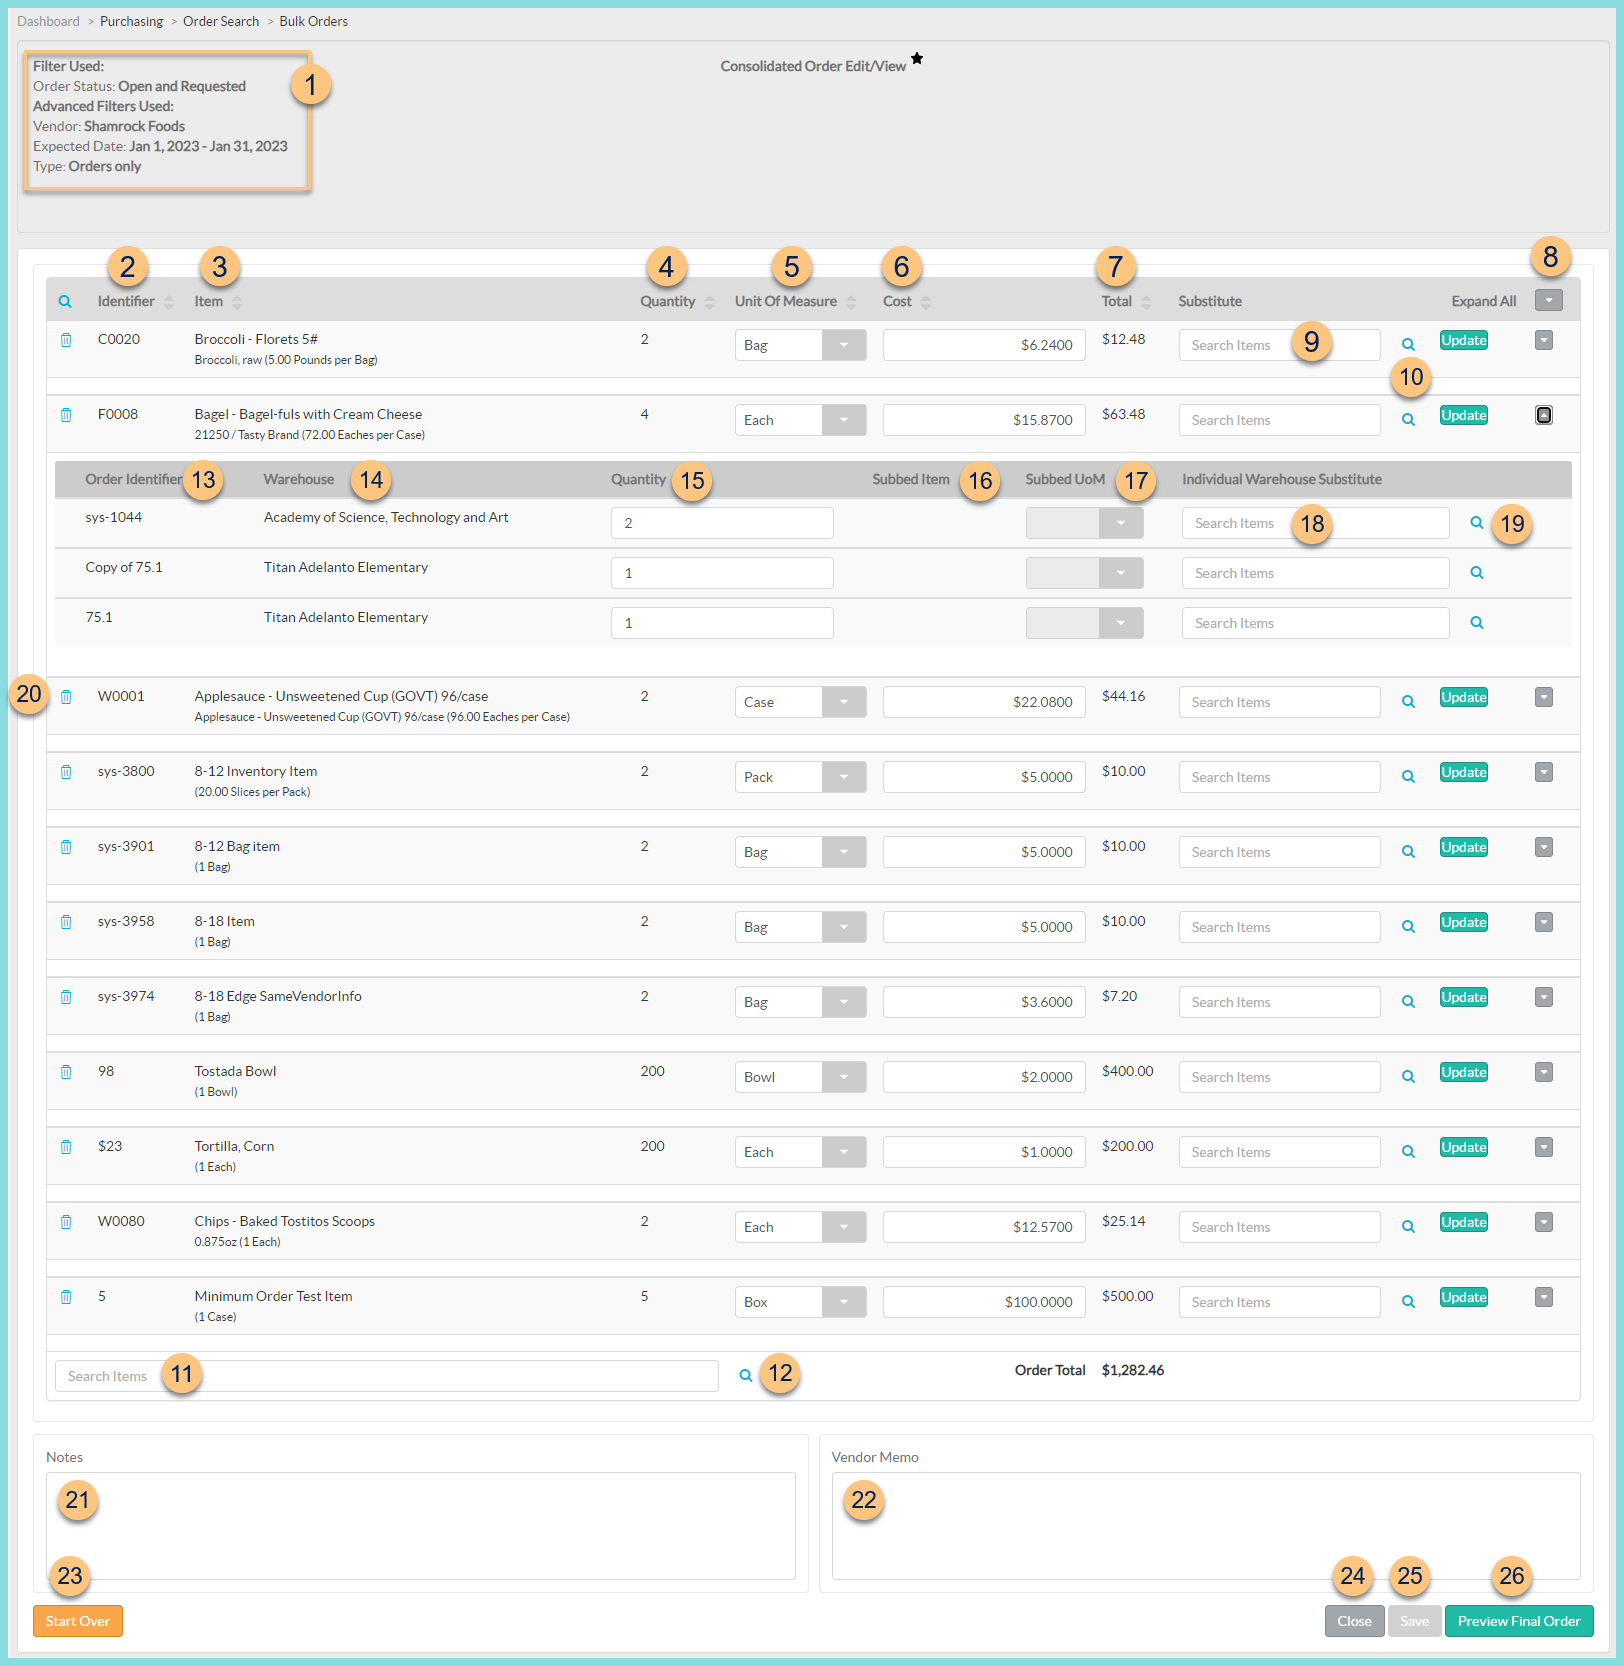
Filter Used - notice the filters used to select the orders to combine.
-
Identifier - click to sort by the item identifier
-
Item - click to sort by the item name. Notice the description and base units per preferred unit of measure.
-
Quantity - click to sort by the total quantity of the combined orders
-
Unit of Measure - click to sort by the unit of measure or select a different unit of measure for all orders. Click Update to see calculated change for the line item.
-
Cost - click to sort by the cost or enter a different item cost for all orders if needed. Click Update to see the calculated changes for the line item.
-
Total - click to sort by the combined total of all orders
-
Expand All Arrow - click to view and modify item details for each item or click the item's Expand Arrow to expand only the respective item
-
Substitute Search Items - search for a Substitute item for all warehouses at a 1:1 ratio by typing an item’s Identifier, Name, or Vendor Identifier. Click Save.
-
Substitute Magnifying Glass - click to open a search window for substitutes
-
Search by Identifier, Name, Vendor Identifier, or Tags.
-
Checkbox - click to select the replacement item. Select the Unit of Measure
-
Replacement Factor - the original quantity is multiplied by the replacement factor and rounded to the nearest quantity
-
Replace - click to select the replacement. Click Save to display the replacement.
-
Bottom Search Items Box - type an item’s Identifier, Name, or Vendor Identifier to add an item to all orders
-
Bottom Magnifying Glass - click to open a search window for additional items
-
Search by Identifier, Name, Vendor Identifier, or Tags.
-
Checkbox - click to select the item to add
-
Warehouse - select the warehouse(s) to which to add each selected item. If blank, the item will be added to All Warehouses.
-
Add - click to add the items
-
Order Identifier - notice the original order identifier
-
Warehouse - notice the warehouse of the original order
-
Quantity - notice the quantity of the original order and modify if needed
-
Subbed Item - notice the subbed item if any
-
Subbed Unit - notice the unit of the subbed item if any
-
Individual Warehouse Substitute - type an item’s Identifier, Name, or Vendor Identifier to substitute an item for the individual order
-
Individual Warehouse Magnifying Glass - click to open a search window for substitutes. See Step 8 for details.
-
Trash Can - click to delete an item from all orders. Click Save.
-
Notes - enter internal notes if needed
-
Vendor Memo - enter a vendor memo to appear on orders if needed
-
Start Over - click to remove all changes and return to the Orders screen
-
Close - click to return to the Orders screen without saving
-
Save - click to save any changes made
-
Preview Final Order - click to be redirected to a review screen
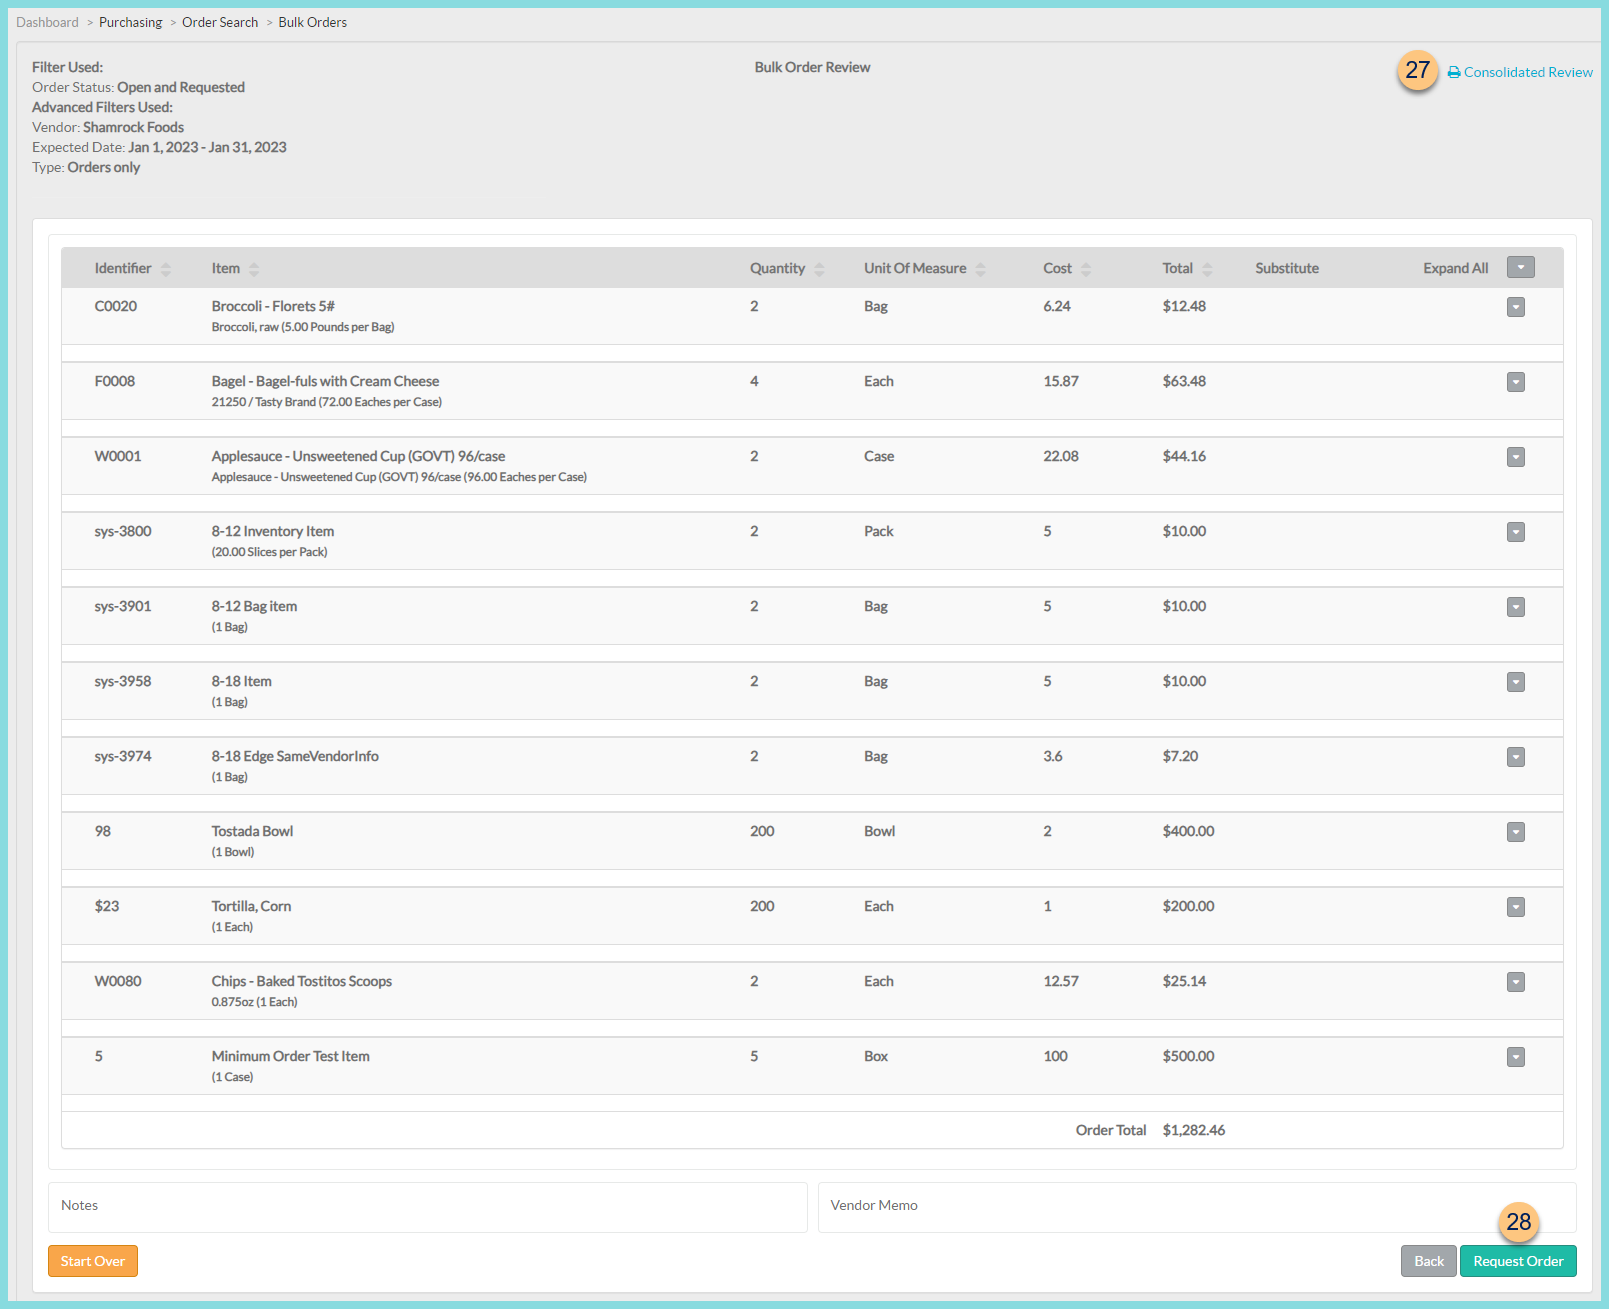
- Print Consolidated Review - click to request a PDF of the consolidated order
-
Request Order - click to request orders